Friday, November 17, 2023

Get the most out of your desktop speakers

In the spirit of a PSA (Public Service Announcement) for audio quality and music enjoyment, and after seeing some desktop setups with very poorly placed desktop speakers. Please try these "mods"! They are either completely free, or ridiculously cheap. They should improve your sound quality and enjoyment in some cases not only noticeably but significantly!

1) Speaker tweeters ought to be placed exactly on the vertices of a 3D equilateral triangle, the third vertex being the center of your head. That means, if center of tweeters are at about arm's length from each other (~70 cm, or 2.3') then each of them should be at that very same distance from your head/ears. Symmetry here is most important. So if not equilateral, an isosceles triangle would be next best, but preserve that symmetry.

2) Tweeters should aim directly towards your ears, and needless to say, with direct line-of-sight between those tweeters and your ears; no obstacles in front of them whatsoever. If needed, either tilt your speakers, or raise them a bit, or do both. Below a photo of my own little desktop speakers as example (ignore the dust and spots :P). Those bases under the little speakers are simple bean cans filled with sand + stones (each one weighs almost 0.7 kg,) covered with the cheapest self-adhesive carpet tiles from the hardware store. That short additional height makes the angled position of the drivers on these speakers laser-aim directly at my ears. Photo is taken from where my head would be. If raising the speakers, use something solid and heavy like that under them, nothing hollow, and nothing prone to wobbling or vibrating. I used those cans because couldn't find cylindrical stone bricks of the right height, although cubic ones were somewhat close.

The above two tips will already improve stereo imaging to better fool your ears into believing voices and sound overall (specially from good stereo recordings) magically come from a "sound wall" floating in empty space in front of you, and not from the speakers themselves.

If you also have a subwoofer, regardless of its size:

3) Try different positions for that little sub under your desk, to get better and more even bass response. In particular, try placing it neither so close to the back wall, nor to any side walls/flat solid surfaces, also not at the same distance from back and side walls.

4) Also raise the sub from the floor a bit using suitable bricks, and immobilize it for good against its own vibrations using more bricks on top. This will make the bass more precise and controlled within the normal capabilities of that sub. Changing its height will also alter the position of cancelling nodes for the low frequencies between floor and ceiling. Use isolation cushioning pads under the sub's feet, and under all those bricks. If yours is a carpeted floor, and you have a down-firing sub, get a large enough garden brick tile and place the sub or lower bricks on that. A down-firing sub should fire its sound against a hard surface, not a carpet.

Those last two tips aim to improve bass reproduction, increasing accuracy and removing the typical boomyness of desktop speaker sets that have a sub. Bass should be as clean and "normal" as possible from the sub in question, in any case not boomy or bloated, yet also not weak/muffled. Bass is always the trickiest thing because of room acoustics, but those changes alone can make major improvements.

To check bass response and sound reproduction in general, I suggest tracks like those listed in these posts:
Audio system testing tracks, Latin music edition
Audio system testing tracks, general

Bonus: 5) Improve the source. This is the only costly mod. To further improve sound reproduction, ignore all your PC's analog audio outs (PC's are electrically *very* noisy) and connect your speakers to an external USB DAC. I use an iFi Zen DAC, shown in the first photo placed below and behind the monitor. It's in fact a DAC and headphone amplifier. To listen with headphones, unplug your speaker set from the DAC/Amp and connect the headphones directly to that DAC/Amp (e.g. neither to the PC nor to a headphone out of the speaker set if there is any.)

To fully enjoy the music you love the most, try these tips. Doing so will get you the very best sound out of your desktop speakers, no matter their price range. Enjoy!

PS. Created a post on Mastodon about this topic. This text above is mostly a clone of it, just to document the same suggestions on this blog.

Tuesday, October 24, 2023

Never buying a new discrete GPU?

A few years ago I proposed a "golden rule" as to when to upgrade your PC: only when you can get 2x the performance for the same price you paid last time. This rule has been perfectly applicable to CPUs. However, the pricing evolution of dedicated GPUs has been so appalling in recent years, the rule is pretty much inapplicable to them. Let's take a look.

The Nvidia GTX 1080 Ti (released in Mar/2017) was the flagship consumer GPU on the market of its time. Its MSRP was about $700, and it sported a PassMark performance score of ~18.5K. (I'm using those scores for GPU performance, so neither average FPS for specific games, nor general gigaflop/compute scores; just those scores from that benchmark.)

Only by Oct/2022 a consumer GPU model appeared on the market capable of exceeding 2x that score of the 1080 Ti. This was the Nvidia RTX 4090, which can achieve ~38.8K.

So it took industry ~5.5. years, but consumers can finally get more than 2x the PassMark score of a 1080 Ti. Here's the catch though: the MSRP of the RTX 4090 was $1600, also more than 2x the MSRP of the 1080 Ti.

So after 5.5 years, if you wanted a flagship GPU with 2x the performance score, you could finally get one, but you also have to pay more than 2x the original cost of the older one. Not to mention, it is also almost twice as power-hungry -> higher electricity costs per year (see GTX 1080 Ti vs. RTX 4090.)

This is hugely different from the pricing/performance evolution of CPUs. If you want a CPU with 2x or more the performance score of a five+ year old CPU, you can easily get one in fact paying even less than the original cost of the older one, and in some cases also getting one that is less power-hungry. An example among many: Intel i7-7700K (Q4/2016) vs. i5-12500 (Q1/2022).

How terrible is the "coupled-doubling" of performance and pricing of flagship GPUs? Well, quite literally: exponentially terrible.

Let's project the trend into the future, doubling both performance and pricing every 5.5 years. If we do that ten times, we get from Oct/2022 to Sep/2077. What performance should we get from a flagship consumer GPU in Sep/2077 then? And at what cost?

That GPU would offer more than 2^10 times (that's 1024x) the performance score of the current flagship RTX 4090 (nice!), but also would cost more than 2^10 times (1024x) the MSRP of the 4090, which was $1600. $1600 by 1024 gives us more than $1.6 MILLION!!! I ought to repeat that in bold and uppercase: MORE THAN $1.6 MILLION!!!

And that's without making any adjustment for inflation between 2022 and 2077. Believe it or not, given the current trend, that's what a flagship consumer GPU ought to cost in 50+ years. Even if three orders of magnitud more powerful, also three orders of magnitude more expensive.

Thanks, but no, thanks.

Basically, with the current pricing trend, it's impossible to get double the performance score in a new GPU at the same original price of a 5+ year-old flagship GPU. If sticking to my "golden rule," I might effectively never again buy a dedicated GPU.

Besides ignoring/breaking my own rule, there is another possible way out: SoCs like the Apple M2 Max. Mighty powerful CPU + GPU in a single chip. Similar to the integrated APUs from AMD used in some gaming consoles/handhelds, and laptops, just way more powerful, and yet more power efficient. Seriously hoping the evolution of SoCs/APUs will be much more promising than what we have seen recently from discrete GPUs.

Saturday, December 18, 2021

Arcane's Ending explained


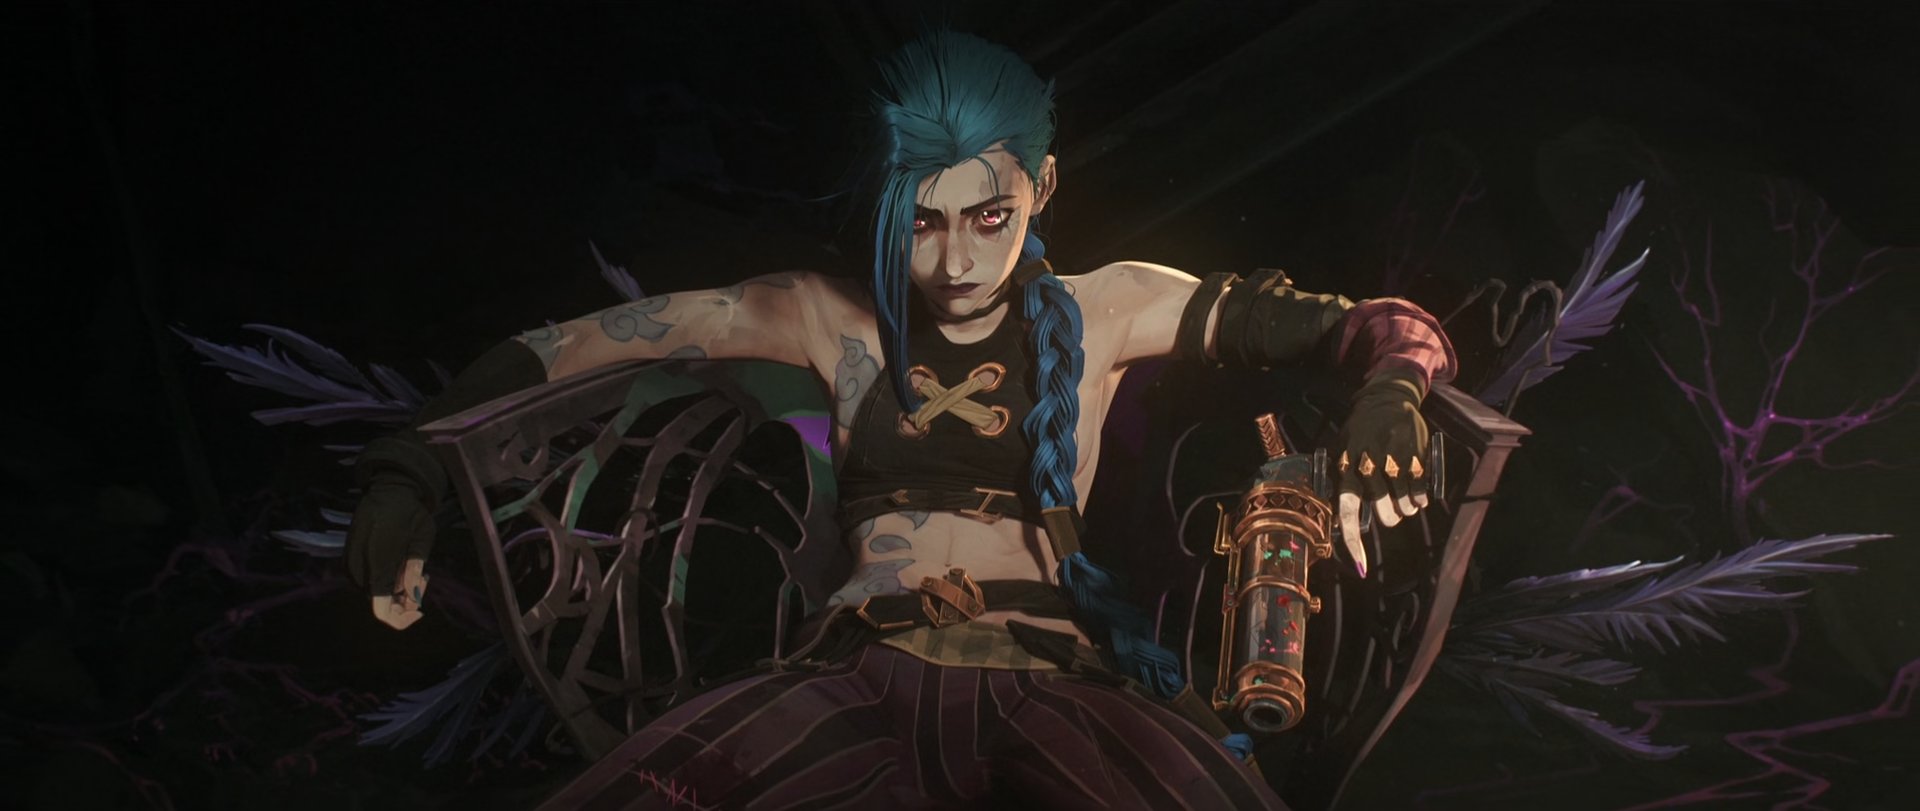
Jinx sitting on the Jinx chair

Needless to say: ***** MAJOR SPOILERS ALERT *****

Writing this after discussions with a friend on whether there was hope for "Powder" to still have a chance to come back over Jinx in a future season. Also after some thoughts I've shared in some Youtube video comments.

The tea-party Jinx organizes in the end of Season 1 of Arcane has in principle the goal of making Vi decide whether Jinx should get back to being Powder, or whether she should remain being Jinx. There is one chair labelled for each possibility. Where should she sit, on the Powder, or on the Jinx chair? Naturally, Vi will not be really able to decide any of this, and most specially not if the Powder choice requires killing Cait, as Jinx asks. But the fact is, Powder/Jinx is truly torn between the two options. Technically I see her torn between two opposing push-pull conflicts:

Powder: Pull towards Vi, her old sister anchor, but aversion to the painful memories. 

Jinx: Pull towards Silco's encouragement and legitimate love, but aversion to... what exactly? Aversion to being on the "bad side"? Aversion to just disagreeing with Vi by being on Silco's side? I think there's more than that.

Opportune to highlight here that at one point the series explicitely associates Powder/Jinx with a symbol of bad luck and death: the crow. In the prelude to the battle between Jinx and Ekko, Ekko's background shows one of the little luminous insects: a firelight. But notice what animal is shown as Powder's background in that same duel: a crow. In general, the crow is associated with darkness, bad luck, sinister deeds, and death. Not surprisingly, a group of crows in English is even called guess what: a "murder." Crows appear several times during the series, and even if Jinx kills one cold blooded and for no reason before she tries the fighting training machine, a crow gets explicitely presented before her battle with Ekko as "her creature," just as much as a firelight as the creature for Ekko.

Notice also that Jinx attempts a murder/suicide at the end of that battle. Yet they both survive. If you listen very closely, it seems Ekko managed to kick the bomb away right before it explodes. From the distant view we get of the explosion, we can first hear what appears to be a sort of kick, and right afterwards comes the boom. This is consistent with Ekko getting most of the damage only in one of his legs, while also consistent with both Ekko and Jinx surviving the explosion, even if we last saw that bomb right next to both of them. 

The fight between Ekko and Jinx seems to be therefore a beautiful metaphorical reconstruction of the eternal fight between good and evil, ying vs. yang. Ekko fighting Jinks is a firelight fighting a crow, light fighting darkness, and life fighting death.

But back to Jinx's dilemma, she is now at the tea-party with her captive "guests," still torn between the two chairs, between going "back to the light" as Powder, or "remaining on the dark side" as Jinx. And Vi starts naming all her old family members, we believe of course with the best intentions, in an attempt to possibly make Powder win over Jinx that way. But Vi does not know or understand that each of those memories is an insufferable wound in Powder's broken mind. They have become Powder's inner demons. As explained by Georgia Dow in her Therapist Reacts Youtube video, and as we can corroborate by just reading the scene quite literally: each of those names becomes an actual monster inside Powder's/Jinx's head, and she gets metaphorically smaller and smaller, and collapses right there under them, completely alone, incidentally, just as she was when Vi left her as Powder.

In all of this, Silco, who shortly before had been strangely quiet even when Cait had physically threatened to kill Jinx with a weapon (but that's maybe because he secretely knows that Jinx now has
been made basically superhumanly fast and strong, so Jinx life was not really at risk there,) now hearing what Vi is saying, seeing Jinx and knowing how those words are hurting Jinx the worst, goes absolutely nuclear and beserk. He will not allow seeing Jinx getting hurt that way. Silco here does not seem to be simply selfishly fearing he would lose Jinx. At this point Silco clearly knows Jinx better than Vi, and he knows that Vi is hurting Jinx as badly as it is conceivably possible. So he goes so violently furious as to manage to release one of his arms in order to shoot Vi and stop her from hurting Jinx. But Jinx hears a click from there, and during her moments of crisis we know (even Silco knows) that she can fire absentmindedly at everything/anything, even her own team members. And so she goes into one of her rampages of careless shooting.

In the aftermath we see that Vi got a close shot on her shoulder, but that one seems to have come from Silco's weapon, since his weapon is shown smoking afterwards. Silco did manage to take a shot at Vi after all, yet we see that Vi is safe. Jinx comes back from her crisis, and we all including her realize then that Silco however got deadly hit several times. She runs to Silco and cries, she is so terribly sorry. But parental Silco in his very last breaths still only wants to reassure her that he would not have given her ever for anything to the Council, that he would not have betrayed her. And she did not even have to cry because she was perfect.

So while Powder accidentally killing her older family members made Vi slap her violently and call her a "jinx," what Mylo used to call her, the most hurtful thing her anchor older role-model sister could have called her in such circumstances before "abandoning" her, now Jinx in one of her blackouts kills
Silco, her new loving parental figure, yet he did not complain at all. He only shows such unconditional love; he encourages her, and in spite of she even killing him, he tells her she is perfect.

What we see afterwards is that the redeemed Silco dies, Jinx somehow manages to bring herself up quite rapidly, then she meditates for some brief moments while breathing slowly. Vi in the background is telling her that everything is ok, but Jinx keeps processing something to herself... Then she goes slowly and with a destroyed expression in front of the Jinx chair to think for some additional silent moments... and then she finally sits on that one, the Jinx chair.

Clearly, it had not been Vi's or anyone else's choice but hers only. And after the catastrophic results of her crisis, she chose the Jinx chair. She chose the dark side.

What I think happened is that Silco's dying words triggered and sealed the decision. Back to the opposing conflicts, in spite of the love from Vi, the aversion/push from the Powder conflict was way too strong and painful, those monstruous memories. While the pull from the Jinx conflict, that unconditional love from Silco in spite of what she had just done, became way too powerful. Jinx in a way must have realized she was indeed someone "whose creature is a crow," someone who brings about bad luck and death. In other words, she was an agent of chaos, effectively a jinx, and Mylo and Vi in their meanest moments had been right all along. But in spite of whatever unbearable repulsion she felt towards that in her Jinx conflict, in the eyes of loving and dying Silco she was perfect. Aversion/push from the Powder conflict, plus the powerful pull from those words from Silco, make Jinx win decisively, and Powder therefore dies.

A
s devastated as she comes out of that, Jinx accepts and embraces herself. She chooses to own it. Therefore she sits on the Jinx chair in fact as if it was a throne, even if a throne of the most desolated, darkest, sorrowful badassness. The rest is a farewell to Vi, almost a self elegy to Powder. And then the fully fledged Jinx is unleashed.

And a double tragedy stands from the council precisely approving the independence of Zaun in that very moment. There was going to be an independent Zaun even with the council still not having Jinx in prison... but Jinx intervenes right then jinxing everything, nailing the highest-profile possible act of domestic terrorism.

As I wrote in my previous post, Arcane is a masterpiece, and in several fronts at that I think, not just as an origins story. Such a powerful tragedy, arguably of a Shakespearean level, as some have already dared to say. For me it brings back a refreshed appreciation towards that old catharsis classical tragedies were supposed to make us feel. It is so painful, so sad and dark, yet also so incredibly well built and drawn, so beautiful. It's as if we are all Silco while Arcane is Jinx: Arcane killing us with pain, but we love her unconditionally, so beautiful, so perfect...


PS. Ultra condensed version of this entire post in six tweets.


Saturday, November 27, 2021

About Arcane


Long story short: Arcane is a masterpiece in several fronts.

The fact that it is based on a video game is completely irrelevant. I for instance have never played the game, and this was a sort of prejudice for me before watching the series. If they expected me to know anything about it, or if the series was full of hidden hints only for those "in the know," it would make me really upset and spoil my enjoyment. But fortunately none of that ever happened. The story builds up and unfolds its own scope with no prerequisites.

No spoilers here. The story revolves around emotional trauma between sisters, to the point of reaching psychotic levels. The daughter-parent or parent figure relationships are just as important if not even more, because they play major roles in quite a number of characters including the main ones. The conflicts all those characters face within the social and political divides in their city, their struggles, the decisions they make, and most specially, how they show us their development. Following the good writing principle of "show, don't tell..." Oh boy, how beautifully do they show us...

If you don't cry easily at emotional, very real-feeling scenes, just because they are "animated," well there was the movie "Grave of the Fireflies" before. Now we have quite a few of the nine episodes of Arcane Season 1 to challenge you. Interestingly, Arcane also has enchanting fireflies.

Powder/Jinx is so fascinatingly presented even in the simplest of moments. Curiously and specially, even while she is sitting; either busy on a chair, saying something grand, or apparently doing almost nothing sitting somewhere. Most other characters also have incredible levels of expressiveness in their faces and voices, both "villains" and "heroes," although categorizing some of Arcane's characters as either one becomes quite blurry. The beauty of visual expressiveness goes beyond just the faces and into hands, as in the delicacy of movements in Jinx's hand releasing one of her deadly granades. As gory as it may sound, even the dead faces I think are masterfully done.

The fast-action animation, and the associated slow-mo takes, are simply amazing and breathtaking. Mind-blowing also comes to mind as quite an adequate description. "Spiderman: Into the Spider-Verse", a recent mind-blowing animation masterpiece on its very own, came to my mind when watching some of Arcane's fast flashing scenes. But Arcane in my opinion has something extra and more refined on top, which are those incredible facial expressions. Even if I actually think they slouched a bit on those from Vi in the last episode (those reminded me a bit too much of Frozen's often cringy mouths.) But Powder's/Jinx's face and emotional baggage is altogether on another level though. So masterfully done, every nanosecond of it, visuals and voice. In fact maybe also Silco's, Ecco's, Mel's, Viktor's, the asian-looking guard's... all of those make me forgive the apparent last chapter slouchness they did with Vi.

Again, no spoilers here, so don't worry, but for me there was another minor annoyance in the very final moments of the series. A weapon trajectory and target was (imho) pointlessly and unnecessarily shown in a confusing way. Something else not so great for me was the last song, "What could have been," crowning the ending, and carried by no less than Sting's voice. The lyrics of course make sense after such a loaded ending, but as much of a fan of Sting's voice as I am, the music and singing honestly did not particularly click too much with me. I also forgive that, specially given Ramsey's gorgeous and haunting "Goodbye" song in the 3rd episode, plus the rest of the outstanding soundtrack.

I hesitated whether voting 9 or 10/10 for Arcane on IMDB. But the visuals, the music, sound overall, the voices, the action, most specially the story, all the tension and struggle, the character development, how they show us what they go through on their faces, their mouths, those eyes, what they say, what they do, and how they show us what they do... My minor nitpicks could not stand against such an overall masterfully flooring spectacle. 10/10. The current IMDB score after 66K votes is 9.4/10. Well deserved. This series is an audiovisual but specially an emotional roller coaster feast. Masterpiece.


PS. If you've already watched the series, psychotherapist Georgia Dow has a few videos on Youtube where she analyzes the emotional depth some characters and parental bonds have in this series. She herself gets emotional some times, shows how powerful the punch from #Arcane is, why so many react so strongly to it. At the time I write this she has posted two videos, but some more are coming, so I will keep adding the links here. Major spoilers there, so only if you've watched the series already:


Arcane: Jinx Act 1 — Therapist Reacts!
Arcane: Silco and Jinx — Therapist Reacts!
Arcane: Vi and Jinx — Therapist Reacts!
Arcane: Young Viktor — Therapist Reacts!
Arcane: Ekko and Jinx (Bridge Fight) — Therapist Reacts!
Arcane: Vi and Caitlyn — Therapist Reacts!
Arcane: Vi and Caitlyn — I Was WRONG!
Arcane: Jinx Act 2 — Therapist Reacts!
Arcane: Mel — Therapist Reacts!
Arcane: Vander — Therapist Reacts!
Arcane: Jayce and Viktor — Therapist Reacts!
Arcane: Jinx Act 3 — Therapist Reacts!
Arcane: Sevika the PERFECT Soldier — Therapist Reacts!


Monday, November 22, 2021

Five years later, 8K still way too much


It's November 2021, so exactly five years after this other post I wrote back in November 2016: Isn't 8K too much?

Today I see this article online: "8K will grow very slowly, even slower than we thought"

So even five years later we see those forecasts, 8K will still grow very slowly. (Rolleyes)

Not surprised one bit.

Even five years later, not only there is still hardly any content in 8K, absolutely noone in the TV/display consumer market is complaining about 4K being too "low-res" or "pixelated", or is there?

And more importantly, not just with 4K or 8K, even if we were offered something as ridiculous as 256K, we could still have that avalanche of pixels displayed with poor contrast, color inaccuracies, and/or undesirable motion artifacts. Higher resolutions will not solve any of that.

HDR (High Dynamic Range, so better contrast ratios, and wider color gamuts) is the actual space for true picture quality improvements. Once with top-notch static image quality, then the more bandwidth we have, the more frames per second the sources should send us, and the more of those frames the displays should show us, for better motion clarity.

If anything increase the frame rates of the sources and of the displays. But how about we stop the BS with resolution. We don't need no higher resolutions (at least not yet.)

So yes, even today, November 2021, five years later. 8K is indeed way too much.

Saturday, May 02, 2020

Some love for your books, please

It really drives me a little crazy every time I see a book covered with self-adhesive plastic. Here's an example borrowed long ago (before the lockdown) from the local library in Bonn. Click any of the photos for a full-size view:


Self-adhesive plastic, like Con-Tact or other brands, will stick to your original book cover permanently. Nothing against Con-Tact et al, just against adhesive plastic used like this on books.

The risky undertaking of removing self-adhesive plastic from a book (e.g. with heat guns or what not,) almost certainly will cause some damage to the exterior of your original book cover. Not to mention cover coloration changes caused by the glue, even if perfect removal was possible.

If you have ever covered any of your books with self-adhesive plastic, I am here to tell you that you should not do that ever again. Ever.

Instead, use non-adhesive plastic and the zero-damage technique hereby described, which:

  • Does not alter the book at all, not allowing any glue or sticky thing to touch any surface of your precious book whatsoever (<= this is single-handedly the most important characteristic.)
  • Because of the above, it is easily removable and hence replaceable, without causing any damage to your book.
  • Protects the book perfectly.

Needless to say, I love books. Have done and enjoyed some DIY book bindings, book cover reconstructions, and book restorations myself actually. But besides that, I have been protecting most of my books this way since I can remember - for sure since undergrad university times, likely since some time in highschool, possibly even primary school.

First of all, the needed materials. This could not be easier:

  • The book you want to protect and cover
  • Non-adhesive plastic of your choice, here using a very nice frosted/textured one
  • Some Cell-o-tape
  • Scissors 
  • Optional: some tupperware-like container (bare with me.)


And here are the steps:

1) Pre-cut all the pieces of cell-o-tape to be used. We will need exactly 12 pieces, each one about 3-4 fingers long. Have them ready to be pulled and used when appropriate. Normally I stick them all onto the edge of a tupperware before starting:


2) Cut a rectangle of the plastic to use as cover, so that when folding it around your book, you would get at least 3-4 fingers of plastic beyond all the borders of the book. Something like the following:


3) Starting with the back, fold the plastic onto the back cover of the book:


4) Apply pieces of cell-o-tape on both ends of the folded plastic, so that it sticks not to the book, but to the plastic itself. This is the whole essence of what we want to do: never sticking anything to the book directly. As you'll see, absolutely all the cell-o-tape pieces are to land completely on the plastic, never on any part of the book:


5) Do the same folding for the front part, and stick the cell-o-tapes there as well, just as we did for the back:


With that, we are four little cell-o-tape pieces down; eight more to go.

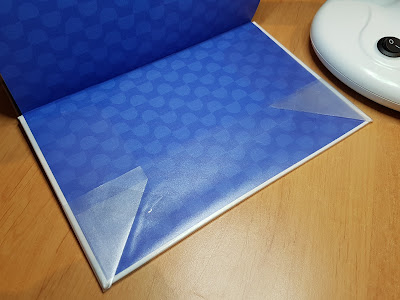
6) Now fold little triangles inwards on each corner of the folds, and then apply tapes on each, again landing the tapes completely on the plastic. You can leave some couple of mm between the triangle and the border of the book, as shown here:


After all four corners are done, we are now eight little tape pieces down; only four more to go. The work so far will look like this:


7) Now near the spine of the book we need to make cuts in the plastic, for the top and bottom folds that will be needed onto the book covers. Two cuts for the front and two for the back, so four cuts in total. This should preferably be done slightly away from the spine edge to make the next step #8 easier:


8) Now starting let's say from the top rear, fold the plastic piece onto the inside of the back cover of the book. A ruler or something similar hard and flat will help a lot in doing this properly. Notice how I sort of pull and pin the plastic down onto the plastic itself which is already folded onto the book cover from the side and from an earlier step:


9) And here comes the magic trick again: apply another little piece of cell-o-tape, this time diagonally, so as to bind that plastic fold coming from the top with the plastic fold coming from the side of the back cover. Yet again: the little sticky tapes are always placed so that they land completely on the plastic, never letting any part of them land on any part of book. They simply hold some of the plastic against some other part of the plastic:


10) Repeat the previous step for the remaining corners, and after that, we are done with the 12 little pieces of cell-o-tape. The work now looks as follows:


11) Now we must finish those little wings of plastic that remain hanging out from the ends of the spine of the book. There are two ways to proceed depending on whether the book is a soft-, or a hard-cover one. Here are both scenarios:

11-A) For soft-cover books: simply trim those little wings of plastic near the spine of the book, and our work is done:


Ta daaaaa!


11-B) For hard-cover books: Some hardcover books have no space between the spine and the spine cover (they might be glued together.) Or even if they are separated, the spine might be too narrow. In those cases, simply proceed as if it was a soft-cover book: just cut the plastic as in step 11-A above.

If there is space between the spine of the book and its cover, and the spine is wide enough, then cut the sides of those little plastic wings, so that you end up with single flaps that can be folded into that space. It is convenient to trim the plastic so that the remaining pieces end up slightly trapezoidal, so wider near the spine's edge, and narrower at the end of the plastic, as shown here for the top flap:


Folding the final little plastic flap into the space between book spine and spine cover:


Push it all the way in, and then, with your fingers, press the plastic softly onto the edge of the spine cover, so that it stays bent and remains put. The same must be done for the bottom flap of course. The end result for a hard-cover book should look like this:


Here a couple of additional photos of this hardcover book showcasing this non-adhesive, zero-damage plastic cover technique:


And here a few more books already covered and protected this way. The yellow one on top does not have the frosted plastic as cover but a completely clear one, so it's hard to see on the photo:


This kind of protective cover is not only super durable, but also perfectly replaceable. If after many years and/or lots of usage that plastic cover looks worn or bad, simply remove it carefully by cutting out the tapes on the corners, unfolding the plastic all the way, removing it, and then going through the process described here once more, covering the book again with a brand new plastic and the same technique: no sticky tiny bit of cell-o-tape ever touching any surface of the book or book cover anywhere. No alteration, no damage whatsoever. Just protection.

Why some libraries keep covering books with self-adhesive plastic really beats me. In any case, I hope this little guide will help you better protect your beloved books.

PS. Step 12) Clean your tupperware! ;)

Saturday, February 22, 2020

Ultimate solution to GPU sag?


If you are looking for the ultimate solution to GPU sag, you came to the right place.

Here are four other working solutions to GPU sag as suggested by famous tech YouTuber's Paul´s Hardware, and Jay's Two Cents. Basically:

#1 (Paul's): PCIe power cables routed upwards and pulling a bit.
#2 (Paul's): buy and install a GPU support bracket
#3 (Paul's): put a toy or some other supporting object right under the saggy corner of the GPU.
#4 (Jay's): install a little m3 screw through the back of the case, right above the GPU tab that is diagonally opposite to the saggy corner of the GPU.

With respect to suggestion #4, I tried it on my own PC and it caused my GPU to overheat massively (+20 ºC). My explanation was that the torsion imparted by the little screw may have warped the GPU board enough to compromise the contact between the GPU die and the GPU cooler. Fortunately, when removing the little m3 screw, the GPU was back to normal thermal behavior. I would not recommend option #4. Wrote a comment about that in Jay´s video.

In any case, neither one of those four solutions is satisfactory when you not just want to avoid GPU sag, but when you really need to immobilize that GPU. For example, when you might want to ship the PC internationally, with a (relatively wobbly) GPU installed. Which is exactly what I needed to do.

Recently I built a mini ITX system for my sister using the following components:
Case: Cougar QBX
PSU: Cooler Master MWE White 450 W
Motherboard: Gigabyte B450 I Aorus Pro Wifi
CPU: AMD Ryzen 3600
CPU Cooler: Noctua NH-L9x65
RAM: Corsair Vengeance LPX 2x8GB 3000 MHz
SSD: WD Blue SSD M.2 Sata 500 GB + Crucial 1 TB Sata
GPU: Asus Strix GTX 1070


The system ought to be shipped from one country in Europe to another, and my sister does not like to have absolutely anything to do with electrical stuff. So she would not welcome the idea of receiving the PC, plus something separately (the GPU), and having to open the PC and install said separate thing somewhere inside there somehow. No siree, nope, not a chance. She would gladly rather wait for my next visit, for me to do that installation myself.

So either I shipped them separately, and I installed in my next visit, or I find a way to really immobilize that sag-prone, wobbly corner of the GPU, and ship the full PC ready for her to power up. I wanted to do the latter, and that´s what I did.

Here´s the process in photos.

First, let´s see the sag-prone corner of the GTX 1070, the GPU in this build. (Ignore the little red electrical tape on the power connector; installed that just to dimm down the blinding white LED of the card.) Notice the top little corner of the backplate of the card, highlighted in the red circle. That is a structural spacer between the actual GPU board, and the plastic ROG backplate on top. One appropriate way to immobilize this specific GPU would be to somehow clamp this point of this corner safely:


The same corner seen from below shows that there is a screw head holding the spacer. Notice also that there are tiny delicate electronics very close by:


The screw head is taller than the tiny components, but just in case I decided to protect all of that with at least five layers of electrical tape, actually not just there but also on the back plate side, so both sides of what would be eventually clamped:


And the following photo shows my little GPU stabilizer solution, with the materials I used. The aluminum flat bar is 2 cm wide, and 2 mm thick. The assembled little screw rod shows the nuts and washers I used. The little black piece at the bottom represents what would be the bottom of the PC case, while the two white cloth pieces represent the aluminum pads that would clamp the now electrical-tape protected, sag-prone corner of the GPU on the previous photos, here represented by a little USB stick drive placed between the white pads:

Here is the rod already installed at the bottom of the Cougar QBX case. Please be aware that drilling into a PC case better be done either without any components in it, or very carefully isolating/protecting all remaining components in the case, so that no metal dust/debris falls on them. Such debris can easily cause short circuits and damage your components, so watch out!


Here some photos showing the construction of the clamping pads. These required some Dremel and metal files. The final size and shape is up to anyone's taste. The important thing I wanted was to have some placement flexibility. That´s why I made that inner slot instead of just a hole for the screw rod. I also decided to apply several layers of electrical tape on the pads' tips, for additional cushioning and isolation between the clamp pads and the GPU corner:


And finally, here is the GPU stabilizer fully installed, holding steady the formerly hanging corner of GPU.


This little stabilizer actually does quite some more than just completely removing GPU sag: now there is no GPU movement whatsoever.

Some additional notes/tips about the final installation process:

First I placed the PC lying horizontally on its back side, so that the whole weight of the GPU was resting on the PCIe slot, and therefore the GPU had no sag whatsoever. That is the exact position of the GPU to preserve and immobilize with the clamp.

All the bottom pad related elements in the stabilizer should be screwed in and loose further down the rod. That means: the bottom clamping pad, and the nuts and washers under it. By the way, as you can see in the photos, I used a total of three washers under the bottom pad: a large one right under the pad, then a smaller split lock washer, then a normal washer between that one and the bottom nut.

The top clamping pad can be completely fixed first and independently of the bottom one. Notice that it prevents the GPU from moving further upwards. That pad can be tightened somewhat strongly, since it´s just a stop, and it can be tightened while the pad is just in contact with the electrical-tape-covered corner of the backplate of the GPU, not pushing it downwards at all, just keeping it exactly where it already is, while preventing it from going anywhere further up. The internal nut and a washer under the top clamping pad not only allows this independent fixing of the top pad, it also helps replicate near the rod the thickness between the clamping tips touching the board.

After the top clamping pad is properly placed and fixed, then the bottom pad should be brought in contact with the underside of the board´s corner. Then the nuts and washers under the bottom pad can be slowly and gently tightened up, till the whole arrangement becomes rigid enough, clamping and completely immobilizing the GPU.

So there you have it: the ultimate solution to GPU sag. Not just a GPU sag killer: it immobilizes the GPU for good. The system can now be safely and worry-free shipped, even with the GPU installed.

Another similar solution could have been not to use clamping pads but a simple horizontal stick somehow attached to the vertical rod, and then immobilize the cables of the GPU power connector attaching them to that stick, maybe with tie-wraps. But I eventually favored the clamping approach since I thought it would provide a lot more precision, stability, and rigidity.

Note of caution: your mileage may vary depending on your specific GPU, how heavy it is, and how its sag-prone corner is actually constructed.

PS. Replaced the main grill using a DIY one with larger holes for better GPU breathability. Made of zinc plated steel, it was quite too shiny. Painted it with a thermal black spray paint, which after dried down required to be placed in the oven at 180 ºC for 1 hour for hardening: