
If you are looking for the ultimate solution to GPU sag, you came to the right place.
Here are four other working solutions to GPU sag as suggested by famous tech YouTuber's Paul´s Hardware, and Jay's Two Cents. Basically:
#1 (Paul's): PCIe power cables routed upwards and pulling a bit.
#2 (Paul's): buy and install a GPU support bracket
#3 (Paul's): put a toy or some other supporting object right under the saggy corner of the GPU.
#4 (Jay's): install a little m3 screw through the back of the case, right above the GPU tab that is diagonally opposite to the saggy corner of the GPU.
With respect to suggestion #4, I tried it on my own PC and it caused my GPU to overheat massively (+20 ºC). My explanation was that the torsion imparted by the little screw may have warped the GPU board enough to compromise the contact between the GPU die and the GPU cooler. Fortunately, when removing the little m3 screw, the GPU was back to normal thermal behavior. I would not recommend option #4. Wrote a comment about that in Jay´s video.
In any case, neither one of those four solutions is satisfactory when you not just want to avoid GPU sag, but when you really need to immobilize that GPU. For example, when you might want to ship the PC internationally, with a (relatively wobbly) GPU installed. Which is exactly what I needed to do.
Recently I built a mini ITX system for my sister using the following components:
Case: Cougar QBX
PSU: Cooler Master MWE White 450 W
Motherboard: Gigabyte B450 I Aorus Pro Wifi
CPU: AMD Ryzen 3600
CPU Cooler: Noctua NH-L9x65
RAM: Corsair Vengeance LPX 2x8GB 3000 MHz
SSD: WD Blue SSD M.2 Sata 500 GB + Crucial 1 TB Sata
GPU: Asus Strix GTX 1070
The system ought to be shipped from one country in Europe to another, and my sister does not like to have absolutely anything to do with electrical stuff. So she would not welcome the idea of receiving the PC, plus something separately (the GPU), and having to open the PC and install said separate thing somewhere inside there somehow. No siree, nope, not a chance. She would gladly rather wait for my next visit, for me to do that installation myself.
So either I shipped them separately, and I installed in my next visit, or I find a way to really immobilize that sag-prone, wobbly corner of the GPU, and ship the full PC ready for her to power up. I wanted to do the latter, and that´s what I did.
Here´s the process in photos.
First, let´s see the sag-prone corner of the GTX 1070, the GPU in this build. (Ignore the little red electrical tape on the power connector; installed that just to dimm down the blinding white LED of the card.) Notice the top little corner of the backplate of the card, highlighted in the red circle. That is a structural spacer between the actual GPU board, and the plastic ROG backplate on top. One appropriate way to immobilize this specific GPU would be to somehow clamp this point of this corner safely:

The same corner seen from below shows that there is a screw head holding the spacer. Notice also that there are tiny delicate electronics very close by:

The screw head is taller than the tiny components, but just in case I decided to protect all of that with at least five layers of electrical tape, actually not just there but also on the back plate side, so both sides of what would be eventually clamped:


And the following photo shows my little GPU stabilizer solution, with the materials I used. The aluminum flat bar is 2 cm wide, and 2 mm thick. The assembled little screw rod shows the nuts and washers I used. The little black piece at the bottom represents what would be the bottom of the PC case, while the two white cloth pieces represent the aluminum pads that would clamp the now electrical-tape protected, sag-prone corner of the GPU on the previous photos, here represented by a little USB stick drive placed between the white pads:


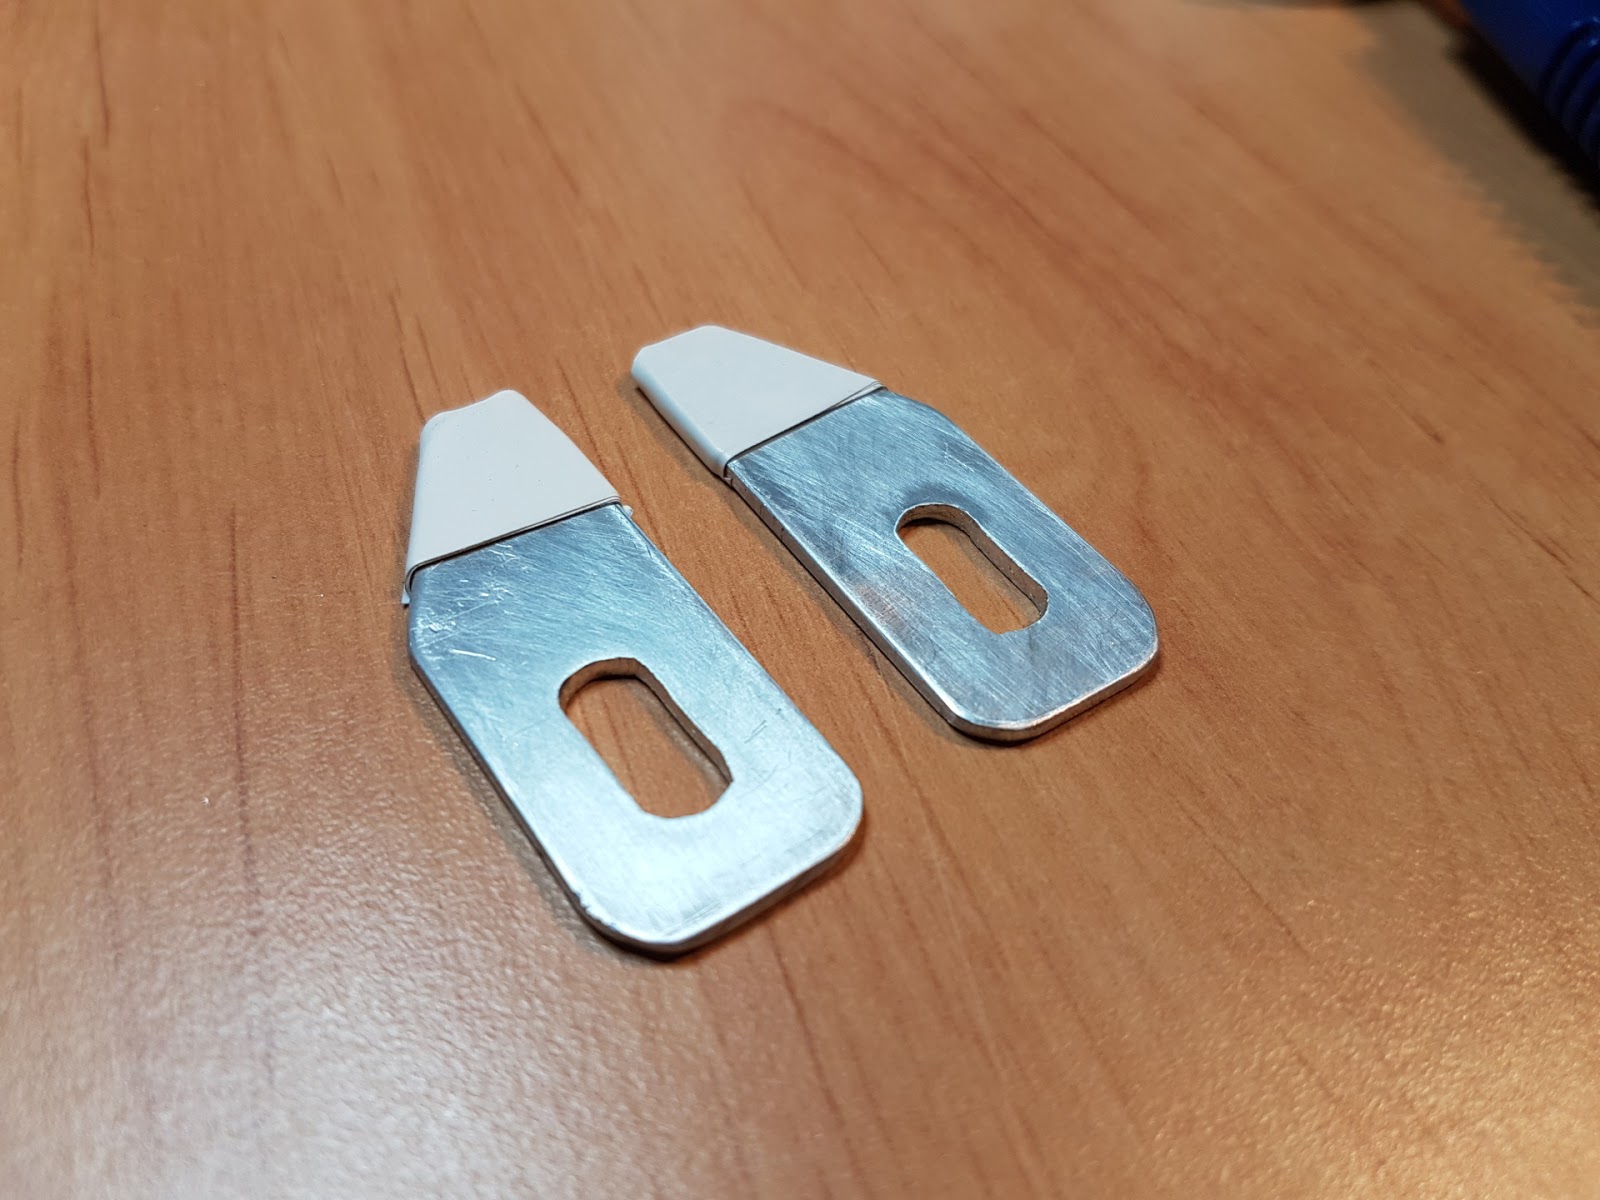
Here some photos showing the construction of the clamping pads. These required some Dremel and metal files. The final size and shape is up to anyone's taste. The important thing I wanted was to have some placement flexibility. That´s why I made that inner slot instead of just a hole for the screw rod. I also decided to apply several layers of electrical tape on the pads' tips, for additional cushioning and isolation between the clamp pads and the GPU corner:


And finally, here is the GPU stabilizer fully installed, holding steady the formerly hanging corner of GPU.

This little stabilizer actually does quite some more than just completely removing GPU sag: now there is no GPU movement whatsoever.
Some additional notes/tips about the final installation process:
First I placed the PC lying horizontally on its back side, so that the whole weight of the GPU was resting on the PCIe slot, and therefore the GPU had no sag whatsoever. That is the exact position of the GPU to preserve and immobilize with the clamp.
All the bottom pad related elements in the stabilizer should be screwed in and loose further down the rod. That means: the bottom clamping pad, and the nuts and washers under it. By the way, as you can see in the photos, I used a total of three washers under the bottom pad: a large one right under the pad, then a smaller split lock washer, then a normal washer between that one and the bottom nut.
The top clamping pad can be completely fixed first and independently of the bottom one. Notice that it prevents the GPU from moving further upwards. That pad can be tightened somewhat strongly, since it´s just a stop, and it can be tightened while the pad is just in contact with the electrical-tape-covered corner of the backplate of the GPU, not pushing it downwards at all, just keeping it exactly where it already is, while preventing it from going anywhere further up. The internal nut and a washer under the top clamping pad not only allows this independent fixing of the top pad, it also helps replicate near the rod the thickness between the clamping tips touching the board.
After the top clamping pad is properly placed and fixed, then the bottom pad should be brought in contact with the underside of the board´s corner. Then the nuts and washers under the bottom pad can be slowly and gently tightened up, till the whole arrangement becomes rigid enough, clamping and completely immobilizing the GPU.
So there you have it: the ultimate solution to GPU sag. Not just a GPU sag killer: it immobilizes the GPU for good. The system can now be safely and worry-free shipped, even with the GPU installed.
Another similar solution could have been not to use clamping pads but a simple horizontal stick somehow attached to the vertical rod, and then immobilize the cables of the GPU power connector attaching them to that stick, maybe with tie-wraps. But I eventually favored the clamping approach since I thought it would provide a lot more precision, stability, and rigidity.
Note of caution: your mileage may vary depending on your specific GPU, how heavy it is, and how its sag-prone corner is actually constructed.
PS. Replaced the main grill using a DIY one with larger holes for better GPU breathability. Made of zinc plated steel, it was quite too shiny. Painted it with a thermal black spray paint, which after dried down required to be placed in the oven at 180 ºC for 1 hour for hardening:

1 comment:
Check out also Jay's latest video "How to fix GPU sag ONCE AND FOR ALL! FREE!" with a new suggestion of his against GPU sag. It does not immobilize the GPU as shown above, but it is at least better than his backscrew suggestion from his older video.
Post a Comment